Like in the previous tutorial we’ll use the Production.Product table from AdventureWorks database coming with SQL Server.
Step 1: Create an Oracle User
If you already have an Oracle User created then you could skip this step, unless you want to create a User only for the current tutorial or for loading other AdventureWorks tables in Oracle. For this we will create first a permanent tablespace (e.g. AdventureWorks), an allocation of space in the database, then create the actual User (e.g. SQLServer) on the just created tablespace, action the will create a schema with the same name as the User, and finally grant the User ‘create session’, ‘create materialized view’ and ‘create table’ privileges.
Open your SQL Developer tool of choice and connect to the Oracle database, then type the following statements and run them one by one, do not forget to provide a strong-typed password in IDENTIFIED BY clause, then create a new connection using the just created User.
-- Create TableSpace
CREATE BIGFILE TABLESPACE AdventureWorks
DATAFILE 'AdventureWorks.dat'
SIZE 20M AUTOEXTEND ON;

-- Create User CREATE USER SQLServer
IDENTIFIED BY <your_password>
DEFAULT TABLESPACE AdventureWorks
QUOTA 20M ON AdventureWorks;

-- Grant privileges
GRANT CREATE SESSION
, CREATE MATERIALIZED VIEW
, CREATE TABLE TO SQLServer;
From SQL Server Management Studio choose the database from which you want to export the data (e.g. AdventureWorks), right click on it and from the floating menu choose Tasks/Export Data
Step 3: Choose a Data Source
In ‘Choose a Data Source’ step select the ‘Data Source’, SQL Server Native Client 10.0 for exporting data from SQL Server, choose ‘Server name’ from the list of SQL Server available, select the Authentication mode and the Database (e. g. AdventureWorks), then proceed to the next step by clicking ‘Next’.
Step 4: Choose a Destination
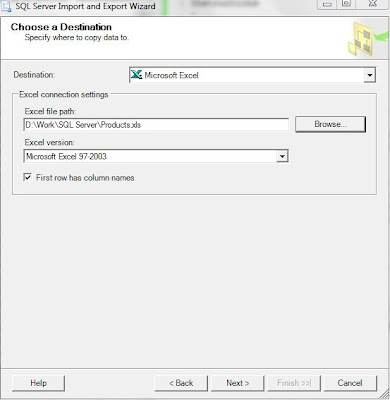
In ‘Choose a Destination’ step select the Destination, in this case ‘Oracle Provider for OLE DB’ and then click on ‘Properties’ in order to provide the connectivity details, in ‘Data Link Properties’ dialog just opened, enter the Data Source (the SID of your Oracle database), the ‘User name’ (e.g. SQLServer), the ‘Password’ and check ‘Allow saving password’ checkbox, without this last step being not possible to connect to the Oracle database. Then test the connection by clicking the ‘Test Connection’, and if the ‘Test connection succeeded’ proceed to the next step.
 Note:
Note:Excepting ‘Oracle Provider for OLE DB’ there are three other drivers that allows you to connect to an Oracle database: ‘Microsoft OLE DB Provider for Oracle’, ‘.Net Framework Data Provider for Oracle’, respectively ‘Oracle Data Provider for .Net’, each of them coming with their own downsizes and benefits.
Step 5: Specify Table Copy Or Query
In this step choose: ‘Copy data from one or more tables or views’ option.
Step 6: Select Source Tables and Views
In ‘Select Source Tables and Views’ step select the database objects (e.g. Production.vProducts) from which you’ll export the data. You could go with the provided Destination table, though if you are using the current settings Oracle table’s name will be “Product” (including quotes) and not Product as we’d expected. There are two options, go with the current settings and change table’s name and columns, they having also this problem, in Oracle, or create the table manually in Oracle. I prefer the second option because I could use the SQL script automatically generated by Oracle, for this with the just chosen table selected click on ‘Edit Mappings’ button that will bring the ‘Column Mappings’ dialog and click the ‘Edit SQL’ button, the query appearing as editable in ‘Create Table SQL Statement’ dialog.
CREATE TABLE sqlserver.Product (
ProductID INTEGER NOT NULL,
Name NVARCHAR2(50) NOT NULL,
ProductNumber NVARCHAR2(25) NOT NULL,
MakeFlag NUMBER NOT NULL,
FinishedGoodsFlag NUMBER NOT NULL,
Color NVARCHAR2(15),
SafetyStockLevel INTEGER NOT NULL,
ReorderPoint INTEGER NOT NULL,
StandardCost NUMBER NOT NULL,
ListPrice NUMBER NOT NULL,
ProductSize NVARCHAR2(5),
SizeUnitMeasureCode NCHAR(3),
WeightUnitMeasureCode NCHAR(3),
Weight NUMBER,
DaysToManufacture INTEGER NOT NULL,
ProductLine NCHAR(2),
Class NCHAR(2),
Style NCHAR(2),
ProductSubcategoryID INTEGER,
ProductModelID INTEGER,
SellStartDate TIMESTAMP NOT NULL,
SellEndDate TIMESTAMP,
DiscontinuedDate TIMESTAMP,
ModifiedDate TIMESTAMP NOT NULL)
Because we have removed the rowguid column from the table created in Oracle, we’ll have to change the mappings, for this click on ‘Edit Mappings’ and in ‘Mapping’ list box from ‘Column Mappings’, in the Destination dropdown next to rowguid column select ‘
You could choose to export more than one table, though for this you’ll have to create manually each table in Oracle and then map the created tables in ‘Select Source Tables and Views’ step.
Step 7: Review Data Type Mapping
Step 8: Save and Run Package
In ‘Save and Run Package’ check the ‘Run immediately’, respectively the ‘Save SSIS Package’ and ‘File System’ option, then proceed to the next step by clicking ‘Next’.
Step 9: Save SSIS Package
In ‘Save SSIS Package’ step provide the intended Name (e.g. Export Products To Oracle) or Description of the Package, choose the location where the package will be saved, then proceed to the next step by clicking ‘Next’.
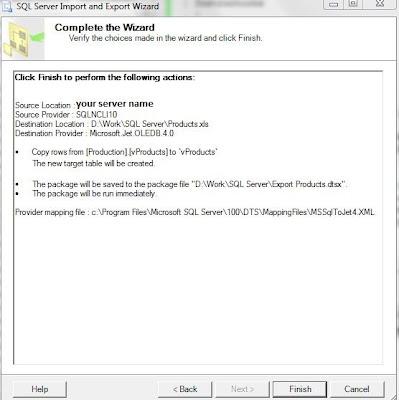
Step 10: Complete the Wizard
Step 11: Executing the Package
Step 12: Checking the Data
If the previous step completed successfully, then you can copy the following statement in Oracle SQL Developer and execute it, the table should be already populated.
SELECT *
FROM sqlserver.Product
If you used other schema to connect to, then you’ll have to replace the above schema (e.g. SQLServer) with your schema.


